Disclosure: this post contains affiliate links. This means if you sign up for PicMonkey’s awesome Royale version, I will earn a small commission & you will be supporting Carrie This Home at no extra cost to you!
My daughter just started preschool last week. (to read more about that, click HERE) Now we have lots of new little friends to get valentines for! I wanted to make DIY PhotoValentines that would be creative, inexpensive, and quick.
Here I’m going to do a quick tutorial of how to make a valentine card using a photo and PicMonkey.com. I love PicMonkey! It’s a great (mostly) free photo editing website. All the wording and labels on my blog are created using PicMonkey. I think it’s my new addiction. Besides blogging, of course!
Some of the features I use in today’s tutorial are part of the Royale version that costs $33.00/year. I use the Royale version on an almost daily basis and it’s been worth every penny! Don’t worry–the free effects can be used for this project with great results!
This is what I created:

Here’s how you can make one of your own!
Go to PicMonkey.com
Click on edit a photo (or create a collage) and choose the photo(s) you want to use.
I did a cool effect on the photo that softens and blurs the outside edges. If you like that effect, here’s how you do it. If not, move down to “Now to make the pretty label!”
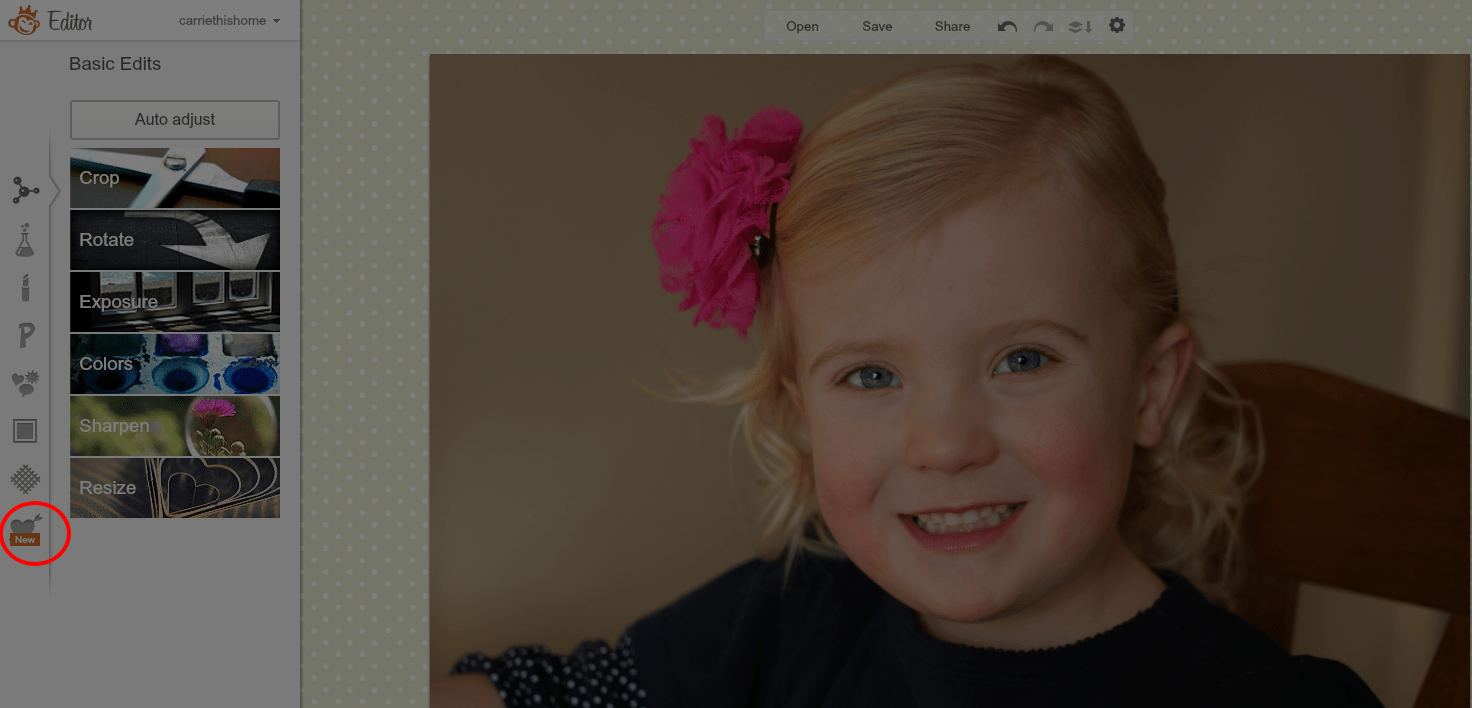
Once your photo appears, click on the little heart icon at the bottom left.
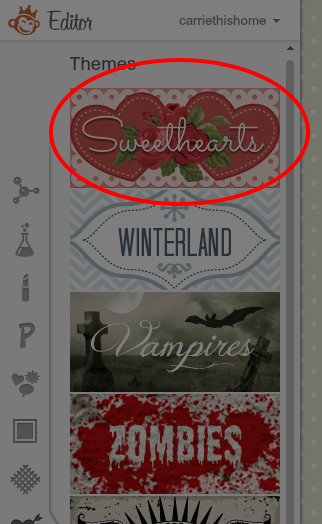
Next, click on the sweethearts icon
Next click on the Desire effect. I know-the name is cheesy but the effect is pretty cool.
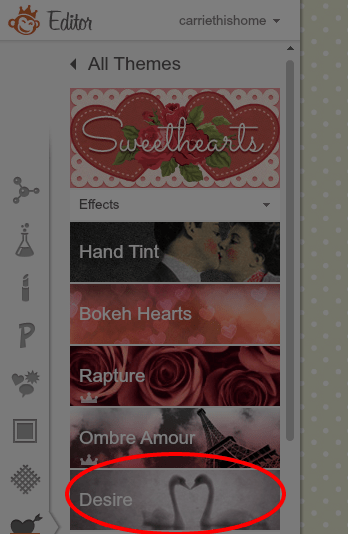
Click on the area of the photo you want to be in focus. You can adjust the focal size and fade until you get the look you want and then click apply. Or if you don’t like the effect, just click cancel and the photo will go back to it’s original state.

Now to make the pretty label!

Click on the overlays button
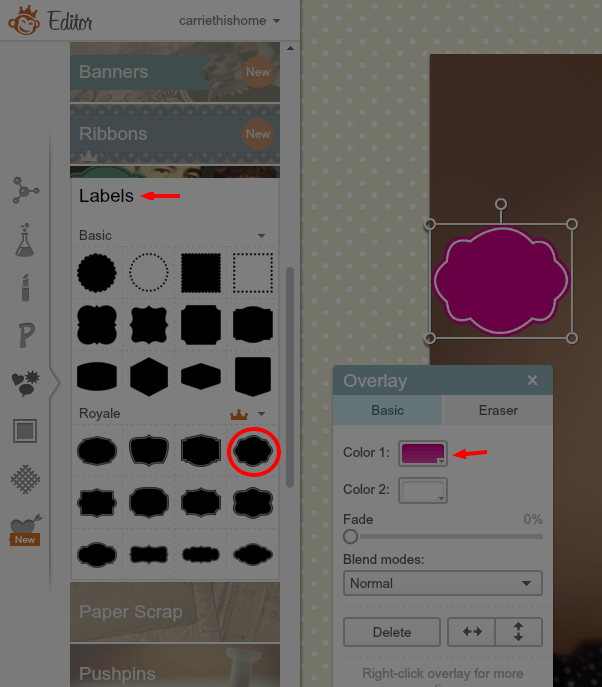
Click on Labels. There’s a lot of different options to choose from (the free ones are at the top) I’m using one from the Royale version.
Click on the label you like. Click on either color 1 or color 2 and choose your colors. Color 1 will fill the inside of the label and color 2 will fill in the edge. Move the label to the desired position on the photo. You can change the size of the label by dragging the corners of the box.
Now that your label is done, you can add text!

Click on the P and pick a text from the list. Then click Add Text and a text box will appear over the picture and a text tool will show up. Type your text and change it’s color with the text tool box. You can change the size of the text by dragging the corners of the box around the text (just like you did with the label). Drag the text over the label to make sure it fits.
Picking out a text is the single step that takes the longest for me because there’s so many good ones to choose from! Take your time and try different ones out.
And there you have it! A quick, creative, and inexpensive valentine! I hope you found this helpful and inspiring!
Disclosure: this post contains affiliate links. This means if you sign up for PicMonkey’s awesome Royale version, I will earn a small commission & you will be supporting Carrie This Home at no extra cost to you!
This post linked to Weekend Wind Down, Saturday Show and Tell, Saturday Sharefest, DIY Sunday Showcase, Project Inspire{d}, Awesome Things Tuesday, Whatever Goes Wednesday, Work It Wednesday, Moonlight and Mason Jars, and Link Party Palooza.


What a cute Valentine card Carrie!!!
I, too, do everything on PicMonkey…what a blessing that program is and so easy too!
Thanks for linking up your post at Project Inspire{d}-AnExtraordinaryDay.net.
Best wishes for An Extraordinary Day!
Diane
Thank you, Diane! I don’t know what I’d do without PicMonkey! I use it for so many different things!
I love PicMonkey, too. I shared how to make a photo bookmark (for grandparents or ?) using it! http://www.thissimplehome.com/2012/06/photo-bookmark-tutorial.html
Thanks for joining in the WWDParty AND linking!
Isn’t PicMonkey the greatest? A photo bookmark is a great idea–I’ll have to check your post out!
Thank you for this step-by-step tutorial. I just got hipped to PicMonkey and I am loving. Was already on the fence about doing the Royale service but this seems like it would be worth my while for sure. Can’t wait to read more from a fellow SITStah!
The Royale version really is worth it! It’s not that expensive and I would pay a little more for it if I had to…it’s that good!
Ooh, I love picmonkey tutorials! I still have so much to learn.
…and thanks for joining us over at #WWDParty!
I’m glad to be a part of the party, Kay! It seems like I learn something new all the time on PicMonkey–I love it!
I love pic monkey too…great post. And cute design btw…
Thank you, Kristen! My header and social media buttons were all made using PicMonkey. I love that site!
I did one with my kids also and got the little heart thing from picmonkey. I love how easy you can do things like this on your own.
I know, isn’t PicMonkey great? I’ve been able to create so many things with my photos using PicMonkey. So thankful I discovered it!
I love pic monkey. I’m still learning new things about it all of the time. I didn’t send out Christmas cards but love the idea of sending valentine’s day cards of my girls. The grandparents would love it!
Thanks!
I gave these to the grandparents last year and they loved it! Hope you have fun making your Valentine!
What a beautiful idea, I love it, Carrie! Another great use for PicMonkey, I like this tool so much!
Honestly PicMonkey is my favorite website because there’s so much you can do with it! Glad to see I have some friends with similar obsessions!
She is adorable and I too love Picmonkey even though I don’t take full advantage of the features. Thank you for linking up with us at #WWDParty – have a wonderful weekend!
Thank you, Antionette! She is my beautiful princess 🙂 There’s so much you can do with PicMonkey–even just with the free features. I have to say that the paid features are totally worth it. I’ve gotten every pennys worth and more with all the projects I’ve done!