


If I told you a couple of boards, some paint and some hooks can easily add character to a wall, you might think I’m crazy.
I don’t blame you for thinking that. I’d think it was crazy too. But then I learned about the magic of board and batten wall treatments.
We installed one as a part of our mudroom project and this was the end result!
The only difference between the before and after was some wood boards, paint and hooks. That’s it. Well, maybe except putting away some coats, but we’ll talk about cleaning another day…

Who knew installing a couple of things to a wall would make such a difference?!? Let’s move on to the tutorial so you can have one too!
Easy Board and Batten Tutorial
This post contains some affiliate links for your convenience. See my full disclosure here.
Supplies needed:
- wood boards in your choice of size
- paint in your choice of color
- nails
- 3 prong hooks
- white caulk (optional)

1. Design
Take some time to think about and design your board and batten wall. Decide what pattern you’d like your boards to create. You can get some fantastic design ideas here.
Also, think of what functions you’d like your wall treatment to have. In our case, we wanted the wall to hang lots of coats, backpacks, and have shelf to hold keys and sunglasses. We made sure that the design would be both beautiful and functional.
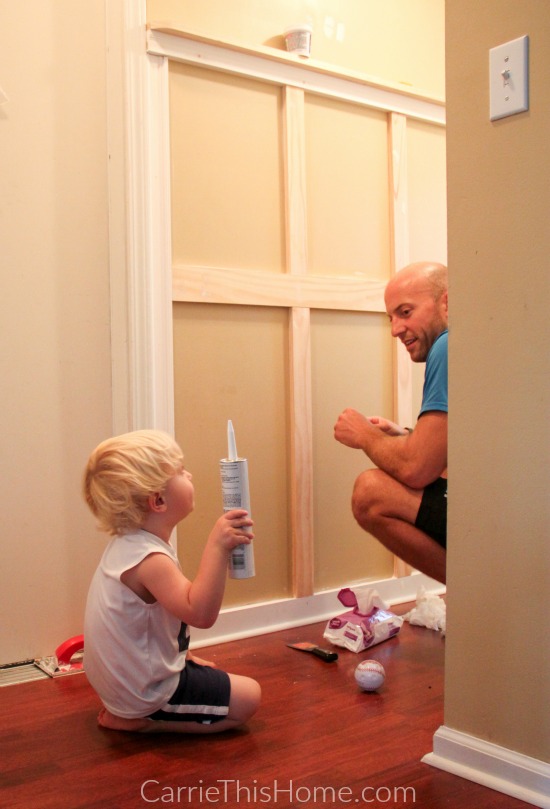
2. Install
Begin by installing the boards in your desired pattern on the wall. We liked this look of a slightly bigger vertical space at the bottom with a small shelf at the top.

While installing the boards, we noticed our walls were slightly curvy, creating a dark space in between the board and wall. Those little shadows were easily seen and looked really bad, so my brilliant hubby used some caulk to fill in she space between the boards and our imperfect walls.
In the DIY world, caulk covers a multitude of sins!
3. Paint
Next, paint the boards and wall the same color to bring the two together into a cohesive look.
4. Add Accesories
Once the paint is dry add some accessories to your board and batten wall. We wanted to add storage, so we installed these awesome 3 prong hooks. Some of the hooks were installed at a higher level for adults, and lower for the kids. The kids even helped with the installation!

I love these 3 prong hooks because one hook can hold several items, making the most of our limited storage space.

5. Enjoy The View
When our board and batten wall treatment was done, I jumped up and down squealing about how awesome it looked. True story. It’s physically impossible for me to hold it in when I’m excited 🙂 So if you enjoy yours as well as I enjoyed mine, go ahead and jump & squeal. I won’t judge.


I love how the artwork pops against the crisp clean wall. You can get that artwork for free here (it’s also available in several patterns and colors!)
This tutorial was shared at: Craft Frenzy Friday, Tutorials & Tips, Skip The Housework, Creative Spark, Work It Wednesday, Create it Thursday, DIY Like A Boss, The DIY Collective, Link Party Palooza, Inspiration Monday, Weekend Wind Down, Project Inspire{d}, Best DIY Projects, Creative Corner and Inspiration Monday.
Did you like this Easy Board and Batten Tutorial? Be sure to check out our other Easy DIY Projects for more inspiration!